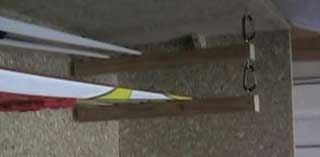
 Something to hang the 2x2's from the ceiling of the box (I used screw eyes and carabiners)
 You'll also need to pick up the "electronics:"
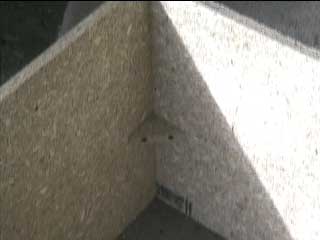 I
used triangular piece of left over particle board to increase the strength of
the box. (The particle board triangular braces inside wanted to split. In the
future, I would use solid wood - leftover 2 X 4 - instead.).
I
used triangular piece of left over particle board to increase the strength of
the box. (The particle board triangular braces inside wanted to split. In the
future, I would use solid wood - leftover 2 X 4 - instead.). 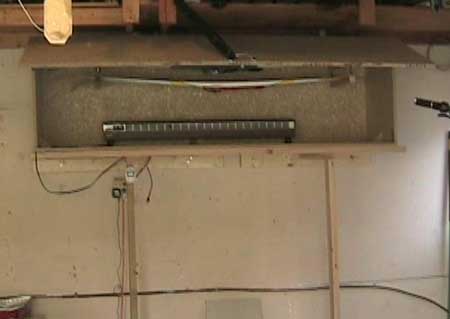 Create a platform for the box to rest upon. The platform is a wood angle attached to the wall to support the back of the box, two legs in the front with a cross bar between them to support the front of the box, and a couple cross pieces connection the legs to the wood angle. The brackets that support the box are all 2 X 4.
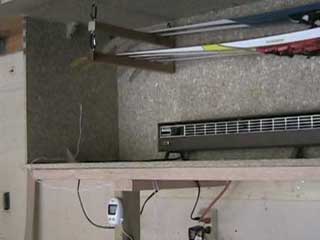 Install the heater in the bottom of the box. Drill out a hole in the bottom of the box to run the power cable and the thermometer wire. Attach the Thermometer to one of the legs. Notice I have attached the thermometer sensor to the inside of the end wall (the white wire)
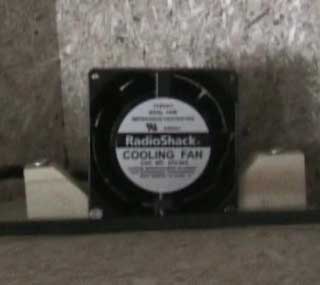
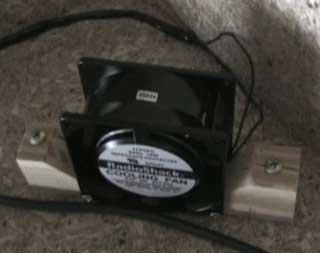 The fan ensures the heat is distributed evenly inside the box. I put the fan in one of the corners. The fan really does not need to be secured because it's heavy enough not to fall over from the force of the air.

Build Your Own Hot Box
Sat, Dec 10, 2005 - By Rob Blazoff
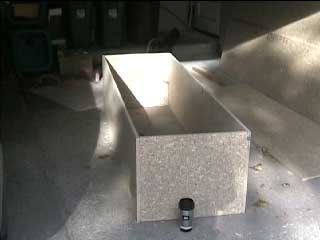
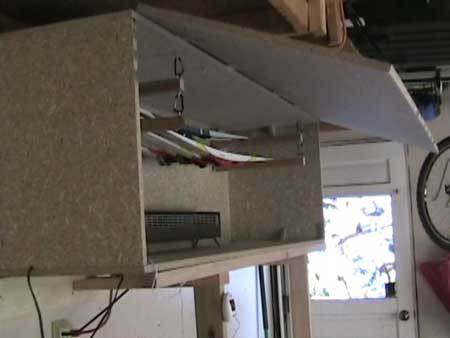 I created a wall-mount wax box based on instructions provide by Nat Brown, former owner of Nordic Ultratune. [Nat's instructions are in his Sept 2003 Newsletter]. The dimensions of my waxbox are 20" deep x 25" tall x 85" long (that's 50.8 X 63.5 X 216 centimeters for everyone else in the world). A smaller box would be lighter and fit in a more compact area. If it was half of the volume it would work just as well. If I do it again, my next box would be about 20 X 15 X 85 inches.
I can probably put 6 pairs of skis in the box at one time. There is still room for a third rack, so this size is plenty large. (I am sure this could keep 20-30 pizzas warm with no problem.)
Using parts begged, borrowed or stolen, the box cost less than $50 to make. Compared that to paying Toko $6,000 for their RS Thermobag! (Granted, the Toko Thermobag is portable.)
Here's the story of how I built my wax box...
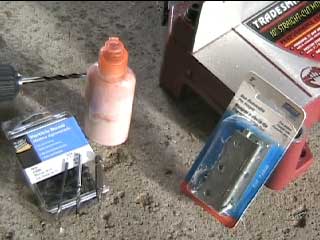 Step 1. Gather your materials. Step 1. Gather your materials.
First, gather the right tools:
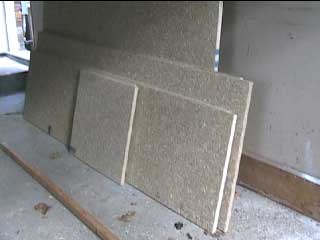
Next, get the materials for the box itself:
|
|
|
 Step 2. Build the box Step 2. Build the box
Glue and screw the edges of the box. I used mostly 3" #8 wood screws. All screws for both the box and the support had pilot holes drilled first. If I was to do it again I would spring for some plywood instead of the particle board. The plywood is more expensive, but it is more sturdy.
To attach the door, I used four 3" hinges and mounted them flush. This left a
gap. The correct way would involve chiseling a small amount of wood to remove
the gap. Because heat loss from the 2 mil gap is minimal, I'm not concerned. |
| 3. Create a Platform for the Box
All screws for both the box and the support had pilot holes drilled first. 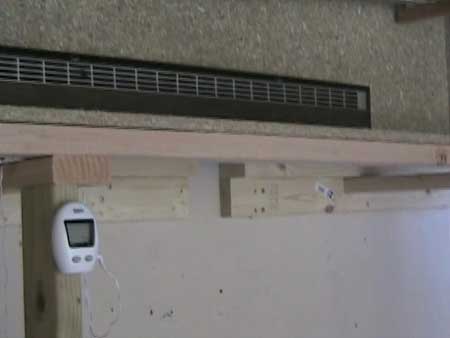 Wood Angles: I screwed 1x4's to the wall, then 1x2's to the top edge of the 1x4's, creating an angle. Wood Angles: I screwed 1x4's to the wall, then 1x2's to the top edge of the 1x4's, creating an angle.
Legs: I used two 2x4's as legs and connected them to the angle with 19" long 1x4's. I then screwed a long 1x2 to the top to the legs, lengthwise where the front of the box will go.
|
| 4. Hang the box
Hang the box on the wall. The box is HEAVY (probably 110-125 lbs) - get help from a friend! Put screws up through the 1x2 angle and the front 1x2 into the bottom of the box.
|
 5. Install the ski mounts 5. Install the ski mounts
I used screw eyes and carabineers to hang the ski holders from the ceiling of the box. The rack inside was hung with carabineers so I could detach the rack to get the skis in. If the rack was built from the bottom of the box, the skis could just slide in. Both methods would work just as well. You could also use screws and hooks or some other method.
|
| 6. Install the heater and thermometer.
|
| 7. Install the fan.
I secured it anyways. |
| 8. Test!
I have run the box for a few hours and found that the fan moves the air well and the temperature is stable at 54C. Time to wax some skis! |