
Reuse Old Bearings in New 100mm Rollerski Wheels
Save some money
Sun, Sep 18, 2005 - By Mike Muha
 |
|
Figure 1. New vs. old: I got my money's worth out of the wheel on the right! |
It's time to replaced wheels when the ski starts tracking funny, you lose too much ground clearance to get over normal bumps, or the rubber starts shredding off the wheel. All three were at work on my old wheels (Figure 1).
The Pro-Ski S3 and Eplex F1 skating rollerskis have similar wheels: narrow, 100 mm diameter rubber wheels. You can buy replacement wheels with or without bearings. Buying without bearings - and reusing your existing bearings - can save you 25% of the purchase costs.
I recently bought replacement wheels, without bearings, for my S3's and thought I show you how to remove bearings from the old wheels and put them into the new.
You need:
- Two blocks of wood (a couple scraps of 2x4 work great)
- A hammer
- A 3/16" socket or a 3/16" bolt
Anatomy of a Wheel
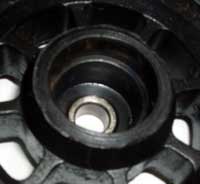
A wheel assembly has four pieces: an axle, two bearings, and the wheel. A ledge inside the center hole of wheel keeps the bearings in place, but still allows the bearings to shift slightly as the wheel flexes. This can cause the bearings to bind. A metal axle is used to prevent the bearings from moving out of parallel to each other.
The axle has a hole length-wise through the middle for the axle that connects the wheel assembly to the rollerski.
To build a wheel assembly requires install a bearing in one side, inserting the axle from the other side, then installing the second bearing. Taking apart the wheel simply reverse the process - in theory.
|
Figure 2. Parts in the wheel assembly | |
  |
 |
|
a. Two bearings fit over an axle, followed by two spacer that also fit over the axle. The bottom picture shows the right spacer part way on the axle. It normally push right up against the bearing. |
b. A ledge inside the wheel keeps the bearings in place. The opposite bearing can be seen through the center. The axle - rather than the ledge in the wheel - actually aligns the bearings. |
1. Create a workspace
Place the two scraps of wood parallel with each other. How far apart? Slightly more than the width of a bearing. Essentially, we're going to force the bearing out between the two blocks of wood (Figures 3b and 3c). You can also use a vice - just put the wheel on top of the open jaws.
2. Remove the old wheel and spacers
Removing the wheel is pretty straight forward. You unscrew the nut and pull out the screw that holds the wheels assembly on the rollerski.
The problem you might run into is getting the spacers off the axle. Sometimes they pull right off with a little hand pressure, sometimes you have to sharply tap then with the side of a screwdriver to loosen them up. In one case, I had to soak them in some oil to loosen them up before they'd come off. But they do come off.
2. Remove bearings and axle from old wheel
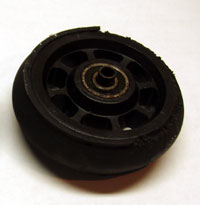
With the spacers off, it time to remove the first bearing. As you can see in Figure 3a, the axle sticks out from the wheel. We're going to hammer down on the axle to push the bearing out the other side.
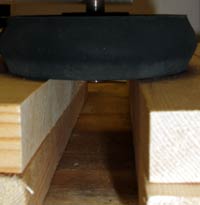
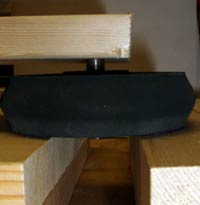
Put the wheel on top of the blocks of wood. Make sure there's room for the axle and the bottom bearing to fall between the blocks! (Figure 3b). Hit the axle sharply with a hammer. (Use another block of wood on top of the axle if you're worried about damaging the axle, as in Figure 3c.).
|
Figure 3. Hammer the axle to push the bearing out | ||
 |
 |
 |
|
a. Notice that axle sticks out from the wheel. To remove a bearing, you use the axle to push it out the other side. |
b. Put the wheel between two blocks of wood so that the bearings are free to fall between the pieces of block. |
c. Hit the axle with a hammer or, if you're worried about accidentally damaging the axle, put a scrap of wood over the axle and hit it instead. |
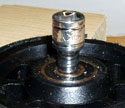
If you hit hard enough, you can probably pull the bottom bearing out from the wheel. If you were a little light with the hammer, it might still stick. Worse, the end of the axle will be flush with the side of the wheel, so hitting it again with the hammer won't help. To solve this dilemma, you need a socket or bolt that is just slightly smaller than the inside diameter of the bearing but not so small as to go through the axle hole in the axle (Figure 4a). I use a 3/16" socket. Place it on top of the axle, carefully ensuring it does not touch the bearing (Figure 4b). A sharp top with the hammer on top of the socket and, POP!, out comes the bearing (Figure 4c).
| Figure 4. If necessary, use a socket to push bearing rest of way | ||
 |
 |
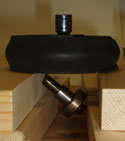 |
| a. The axle has pushed the bearing part way. Put a 3/16" socket or bolt on the axle. | b. The socket above is only touching the axle, not the bearing. |
c. One good pound on the socket pushes the axle and the bottom bearing out of the wheel |
Now turn the wheel over and use the socket (if it's long enough - mine isn't) or the end of a bolt to push the remaining bearing out. Make sure the socket or bolt pushes on the metal part of the bearing, not on the plastic dust protector (Figure 5).
|
Figure 5. Push the remaining bearing out with the end of a bolt. |
 |
3. Install bearings and axle in the new wheel
Reverse the steps to install the bearings and space in the new wheel:
Push a bearing into the wheel as far as possible - which isn't very far - then turn it over so the bearing is on the table. Push down on the wheel with both hands to drive the wheel onto the bearing (Figure 6a).
Next, move the blocks of wood to an axle's width apart.
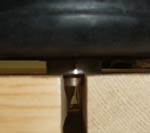
Insert the axle into the wheel and through the just installed bearing. Put the second bearing over the axle and down on the wheel so it sticks. Turn the wheel over and place it on the blocks of wood so the bearing is supported by the wood and the axle is sticking through (Figure 6b).
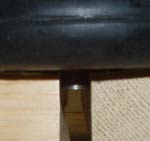
Push down on the wheel with both hands to force the bearing into the wheel (Figure 6c).
Finally, reinstall the spacers over the axle. Don't forget this step! If you do, your wheel won't spin once it's reinstalled back on the rollerski!
| Figure 6. Push the wheel onto the bearings. | ||
 |
 |
 |
|
a. Push a bearing as far as possible into the wheel. Then lay the wheel so the bearing is underneath and use both hands to push the wheel down over the bearing |
b. Put the axle in, then the second bearing. Move the blocks of wood together to support the bearing. |
c. Use both hands to push the wheel down over the second bearing |
Repeat for the other three wheels and you're good to go...and you've saved yourself a few bucks over buying wheels with new bearings already installed.
Thanks to Team NordicSkiRacer.com member Steve Kuhl for ideas on how to change wheels!
